STM32使用DMA发送串口数据 |
您所在的位置:网站首页 › stm32h7 dma发送 › STM32使用DMA发送串口数据 |
STM32使用DMA发送串口数据
|
1、概述
上一篇文章《STM32使用DMA接收串口数据》讲解了如何使用DMA接收数据,使用DMA外设和串口外设,使用的中断是串口空闲中断。本篇文章主要讲解使用DMA发送数据,不会讲解基础的串口和DMA知识,直接上代码,如果有同学对DMA和串口都不熟悉,建议看一下上篇文章《STM32使用DMA接收串口数据》。 使用DMA发送数据,首先我们要确认使用的串口有没有DMA。 我们使用USART1串口外设,从数据手册中可以查到,USART1的发送和接收都是支持DMA的,使用的是DMA2.
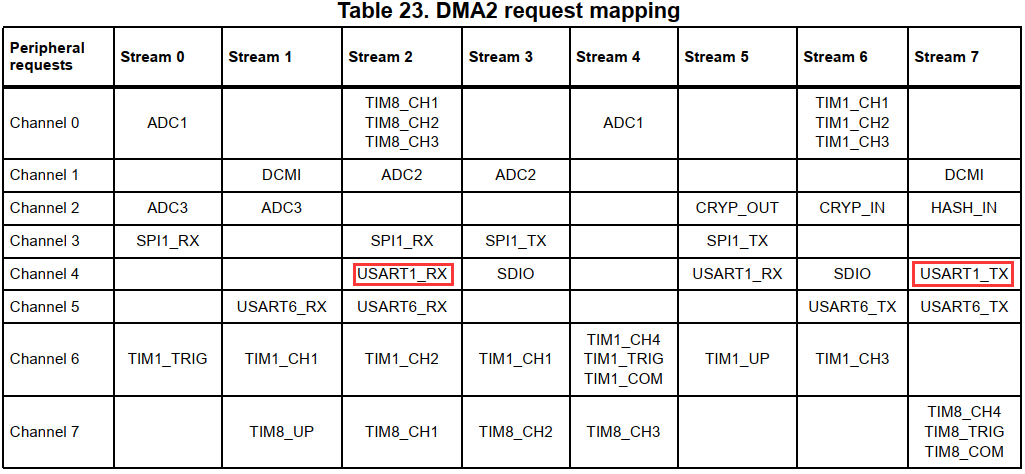
接下来就是撸代码的时刻了 02、代码DMA串口发送的代码是在上一篇文章DMA串口接收的基础上修改的。 void UART_Init(void) { USART_InitTypeDef USART_InitStructure; GPIO_InitTypeDef GPIO_InitStructure; NVIC_InitTypeDef NVIC_InitStructure; /* Enable GPIO clock */ RCC_AHB1PeriphClockCmd(RCC_AHB1Periph_GPIOA, ENABLE); /* Enable UART1 clock */ RCC_APB2PeriphClockCmd(RCC_APB2Periph_USART1, ENABLE); /* Connect PXx to USARTx_Tx*/ GPIO_PinAFConfig(GPIOA, 9, GPIO_AF_USART1); /* Connect PXx to USARTx_Rx*/ GPIO_PinAFConfig(GPIOA, 10, GPIO_AF_USART1); /* Configure USART Tx as alternate function */ GPIO_InitStructure.GPIO_OType = GPIO_OType_PP; GPIO_InitStructure.GPIO_PuPd = GPIO_PuPd_UP; GPIO_InitStructure.GPIO_Mode = GPIO_Mode_AF; GPIO_InitStructure.GPIO_Pin = GPIO_Pin_9; GPIO_InitStructure.GPIO_Speed = GPIO_Speed_50MHz; GPIO_Init(GPIOA, &GPIO_InitStructure); /* Configure USART Rx as alternate function */ GPIO_InitStructure.GPIO_Mode = GPIO_Mode_AF; GPIO_InitStructure.GPIO_Pin = GPIO_Pin_10; GPIO_Init(GPIOA, &GPIO_InitStructure); USART_InitStructure.USART_BaudRate = 115200; USART_InitStructure.USART_WordLength = USART_WordLength_8b; USART_InitStructure.USART_StopBits = USART_StopBits_1; USART_InitStructure.USART_Parity = USART_Parity_No; USART_InitStructure.USART_HardwareFlowControl = USART_HardwareFlowControl_None; USART_InitStructure.USART_Mode = USART_Mode_Rx | USART_Mode_Tx; /* USART configuration */ USART_Init(USART1, &USART_InitStructure); USART_ITConfig(USART1, USART_IT_IDLE, ENABLE); /* Enable the USARTx Interrupt */ NVIC_InitStructure.NVIC_IRQChannel = USART1_IRQn; NVIC_InitStructure.NVIC_IRQChannelPreemptionPriority =0; NVIC_InitStructure.NVIC_IRQChannelSubPriority = 0; NVIC_InitStructure.NVIC_IRQChannelCmd = ENABLE; NVIC_Init(&NVIC_InitStructure); /*使能串口DMA接收*/ USART_DMACmd(USART1, USART_DMAReq_Rx, ENABLE); /*使能串口DMA发送*/ USART_DMACmd(USART1, USART_DMAReq_Tx, ENABLE); /* Enable USART */ USART_Cmd(USART1, ENABLE); }在这里除了常规的串口配置,我们需要配置串口的DMA发送,和串口DMA接收一样的API函数,参数修改为USART_DMAReq_Tx即可。 串口DMA发送配置 void Uart_Send_DMA_Config(void) { DMA_InitTypeDef DMA_InitStructure; /* Enable DMA clock */ RCC_AHB1PeriphClockCmd(RCC_AHB1Periph_DMA2, ENABLE); /* Reset DMA Stream registers (for debug purpose) */ DMA_DeInit(DMA2_Stream7); /* Check if the DMA Stream is disabled before enabling it. Note that this step is useful when the same Stream is used multiple times: enabled, then disabled then re-enabled... In this case, the DMA Stream disable will be effective only at the end of the ongoing data transfer and it will not be possible to re-configure it before making sure that the Enable bit has been cleared by hardware. If the Stream is used only once, this step might be bypassed. */ while (DMA_GetCmdStatus(DMA2_Stream7) != DISABLE) { } /* Configure DMA Stream */ DMA_InitStructure.DMA_Channel = DMA_Channel_4; //DMA请求发出通道 DMA_InitStructure.DMA_PeripheralBaseAddr = (uint32_t)&USART1->DR;//配置外设地址 DMA_InitStructure.DMA_Memory0BaseAddr = (uint32_t)UART_Buffer;//配置存储器地址 DMA_InitStructure.DMA_DIR = DMA_DIR_MemoryToPeripheral;//传输方向配置 DMA_InitStructure.DMA_BufferSize = (uint32_t)UART_RX_LEN;//传输大小 DMA_InitStructure.DMA_PeripheralInc = DMA_PeripheralInc_Disable;//外设地址不变 DMA_InitStructure.DMA_MemoryInc = DMA_MemoryInc_Enable;//memory地址自增 DMA_InitStructure.DMA_PeripheralDataSize = DMA_PeripheralDataSize_Byte;//外设地址数据单位 DMA_InitStructure.DMA_MemoryDataSize = DMA_MemoryDataSize_Byte;//memory地址数据单位 DMA_InitStructure.DMA_Mode = DMA_Mode_Normal;//DMA模式:正常模式 DMA_InitStructure.DMA_Priority = DMA_Priority_High;//优先级:高 DMA_InitStructure.DMA_FIFOMode = DMA_FIFOMode_Disable;//FIFO 模式不使能. DMA_InitStructure.DMA_FIFOThreshold = DMA_FIFOThreshold_Full;// FIFO 阈值选择 DMA_InitStructure.DMA_MemoryBurst = DMA_MemoryBurst_Single;//存储器突发模式选择,可选单次模式、 4 节拍的增量突发模式、 8 节拍的增量突发模式或 16 节拍的增量突发模式。 DMA_InitStructure.DMA_PeripheralBurst = DMA_PeripheralBurst_Single;//外设突发模式选择,可选单次模式、 4 节拍的增量突发模式、 8 节拍的增量突发模式或 16 节拍的增量突发模式。 DMA_Init(DMA2_Stream7, &DMA_InitStructure); /* DMA Stream enable */ // DMA_Cmd(DMA2_Stream7, ENABLE); }这里也是常规的DMA配置流程,不明白的同学请看文章《STM32DMA详解》,这里值得注意的是,配置完成并没有使能DMA2_Stream7,使能了就会立即将UART_Buffer的数据发送出去。 其他代码处理 void USART1_IRQHandler(void) { uint8_t temp; if(USART_GetFlagStatus(USART1, USART_FLAG_IDLE) == SET) { DealWith_UartData(); // USART_ClearFlag(USART1, USART_FLAG_IDLE); temp = USART1->SR; temp = USART1->DR; //清USART_IT_IDLE标志 } } void DealWith_UartData() { DMA_Cmd(DMA2_Stream2, DISABLE); UART_Receive_flg = 1; UART_Receive_len = UART_RX_LEN - DMA_GetCurrDataCounter(DMA2_Stream2); UART_Buffer[UART_Receive_len] = 0; DMA_SetCurrDataCounter(DMA2_Stream2,UART_RX_LEN); DMA_ClearFlag(DMA2_Stream2, DMA_FLAG_TCIF2); DMA_Cmd(DMA2_Stream2, ENABLE); } int main(void) { UART_Receive_flg = 0; Uart_Reveice_DMA_Config(); Uart_Send_DMA_Config(); UART_Init(); while (1) { if(UART_Receive_flg) { UART_Receive_flg = 0; Uart_Send_DMA_Start(); } } }上面3个函数,简单逻辑就是,当串口使用DMA接收了一定量的数据,就会通过串口DMA发送出去,串口DMA发送的代码如下: void Uart_Send_DMA_Start(void) { DMA_SetCurrDataCounter(DMA2_Stream7,UART_Receive_len); DMA_ClearFlag(DMA2_Stream7, DMA_FLAG_TCIF7); /* DMA Stream enable */ DMA_Cmd(DMA2_Stream7, ENABLE); } 03、后记这一篇很简单,就是DMA使用的一个延伸,上面说了这么多,也贴了很多代码,不可能将所有代码全部贴出来,作为软件工程师,还是在IDE里看代码方便,如果感兴趣的话,可以到下面github链接下载代码,Keil和IAR的工程文件都有。 PCB和工程代码开源地址: https://github.com/strongercjd/STM32F207VCT6
点击查看本文所在的专辑,STM32F207教程 |
【本文地址】